
Vantrue N4 Manual: Comprehensive Guide

Vantrue’s N4 Pro offers 3-channel recording with voice control; this guide details unboxing, installation, settings, troubleshooting, and legal considerations for optimal use.
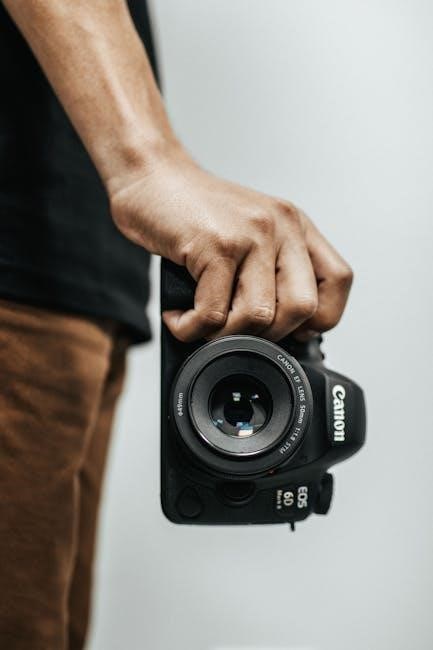
The Vantrue N4 is a sophisticated 3-channel dash camera designed for comprehensive vehicle surveillance. Featuring front, interior, and rear recording capabilities, it provides 360-degree protection. Its intelligent features, including voice control, enhance usability and safety on the road.
This manual serves as a complete guide, covering everything from initial setup and configuration to advanced features like ADAS and parking monitoring. Understanding its functionalities ensures you maximize the benefits of this advanced dashcam, offering peace of mind and crucial evidence when needed.
Unboxing and Package Contents
Upon opening your Vantrue N4 package, carefully inspect the contents. You should find the N4 dash camera unit itself, along with the front, interior, and rear camera modules. Essential accessories include the GPS module for location tracking, a power cable for cigarette lighter connection, and a USB cable for data transfer.
Additional items comprise mounting brackets for secure camera placement, adhesive pads for alternative mounting, a detailed instruction manual, and potentially, extra fuses. Verify all components are present and undamaged before proceeding with installation.
Camera Overview: Front, Interior, and Rear
The Vantrue N4 features a three-camera system. The front camera captures the road ahead in high definition, providing crucial evidence in incidents. The interior camera monitors the vehicle’s cabin, recording passenger activity. The rear camera records behind the vehicle, offering comprehensive coverage.
Each camera boasts wide-angle lenses for a broader field of view. They are designed for simultaneous recording, ensuring a complete picture of your surroundings. The N4’s design prioritizes discreet installation and optimal visibility.
Installation Guide: Wiring and Placement
Proper installation is crucial for optimal Vantrue N4 performance. Begin by carefully routing the power cable along the vehicle’s headliner, concealing it for a clean look. Secure the cables to avoid interference with driving. Ensure the front camera has a clear view of the road, and the interior camera covers the cabin effectively.
The rear camera should be positioned to capture the rear view without obstruction. Consult the manual for specific wiring instructions and safety precautions during installation.

Mounting the Front Camera
Securely mount the Vantrue N4’s front camera using the provided adhesive mount, ensuring a firm attachment to the windshield. Position it behind the rearview mirror for a discreet installation and unobstructed view. Avoid placing it directly in front of sensors or obstructing driver visibility.
Adjust the camera angle to capture the widest possible field of view of the road ahead. Tighten the mount securely, but avoid over-tightening, which could damage the windshield.
Installing the Interior Camera
The Vantrue N4’s interior camera monitors the vehicle’s cabin. Utilize the included adhesive mount to securely attach it to the windshield, facing inwards. Position it to capture both front and rear passengers, avoiding direct sunlight or obstructions.
Ensure the interior camera’s view isn’t blocked by headrests or other interior elements. Adjust the angle for optimal coverage, prioritizing clear visibility of the cabin area for recording purposes.
Positioning the Rear Camera
The Vantrue N4’s rear camera provides comprehensive coverage of the vehicle’s rear surroundings. Mount it near the rear windshield, ensuring a clear view of the road behind. Route the cable discreetly along the headliner and down the pillar to avoid interference.

Adjust the camera angle to capture the entire rear view, including license plates and lane markings. Secure the cable firmly to prevent it from becoming loose during driving, maintaining optimal recording quality.
Initial Setup and Configuration
Upon powering on your Vantrue N4, insert a formatted microSD card to enable recording. Navigate the menu to set the date and time accurately. Configure the resolution settings based on your preference – higher resolution yields clearer footage but requires more storage.
Familiarize yourself with basic settings like screen timeout and volume control. Ensure loop recording is enabled to overwrite older files automatically, maximizing storage efficiency. Adjust G-sensor sensitivity for optimal impact detection.
Powering On and Basic Settings

To power on the Vantrue N4, press and hold the power button until the screen illuminates. The initial setup prompts you to set the date, time, and preferred resolution. Access basic settings via the menu button; here you can adjust screen brightness, recording volume, and enable/disable audio recording.
Ensure the date and time are correct for accurate timestamping of events. Explore options for screen timeout to conserve battery life. Familiarize yourself with the menu navigation for future adjustments.
Loop Recording Explained
Loop recording on the Vantrue N4 automatically overwrites the oldest footage when the SD card reaches full capacity, ensuring continuous recording. You can customize loop recording segment lengths – typically 1, 3, 5, or 10 minutes – within the camera’s settings menu. Shorter segments offer more detailed time-stamping, while longer segments reduce file fragmentation.
This feature eliminates the need for manual file deletion, providing seamless operation. Remember that footage involved in incidents, protected by the G-sensor, will not be overwritten.
G-Sensor Sensitivity Adjustment
The Vantrue N4’s G-sensor detects impacts and sudden movements, automatically locking and saving the corresponding footage. Adjusting the sensitivity is crucial for optimal performance. Lower sensitivity minimizes false triggers from bumps, while higher sensitivity captures even minor incidents.

Access the G-sensor settings in the camera menu and experiment with different levels – Low, Medium, and High – to find the best balance for your driving conditions. Properly configured, it safeguards vital evidence.
Understanding Recording Modes
The Vantrue N4 dashcam offers versatile recording modes to suit various needs. Normal Recording Mode continuously captures footage while driving, providing a comprehensive record of your journeys. Parking Monitoring Mode activates when the ignition is off, utilizing the G-sensor to detect impacts or motion, ensuring surveillance even when unattended.
Switching between modes is easily done through the camera’s menu. Understanding these modes allows you to maximize the N4’s protective capabilities.
Normal Recording Mode
In Normal Recording Mode, the Vantrue N4 continuously records video from all three cameras – front, interior, and rear – while the vehicle is powered on. This mode is ideal for capturing everyday driving experiences and provides crucial evidence in the event of an accident. Footage is automatically saved in loop recordings, overwriting older files when the SD card is full.
Ensure sufficient SD card capacity for desired recording duration. This mode is the default setting upon startup.
Parking Monitoring Mode
Parking Monitoring Mode utilizes the Vantrue N4’s G-sensor to detect impacts or motion while your vehicle is parked. When triggered, the camera automatically records a short clip, preserving potential evidence of hit-and-runs or vandalism. This feature requires a hardwiring kit for continuous power, as it won’t function solely on the car battery.

Adjust G-sensor sensitivity within the settings to minimize false alarms. Ensure proper hardwiring installation for reliable operation.

Advanced Features and Settings
The Vantrue N4 boasts several advanced features enhancing its functionality. Voice Control allows hands-free operation, enabling you to start/stop recording or take snapshots using simple voice commands. ADAS (Advanced Driver Assistance Systems) provide lane departure and collision warnings, increasing road safety.
Explore settings for customizing recording resolution, timestamp formats, and G-sensor sensitivity. Regularly check for firmware updates to unlock new features and improve performance.
Voice Control Functionality
The Vantrue N4’s voice control offers a hands-free experience. Activate the feature through the settings menu and use specific voice commands to operate the dashcam. Supported commands include “Start Record,” “Stop Record,” and “Take Picture.” Ensure clear pronunciation for accurate recognition.
This feature minimizes driver distraction, promoting safer driving. Refer to the full manual for a complete list of commands and troubleshooting tips regarding voice control performance.
ADAS (Advanced Driver Assistance Systems)
The Vantrue N4 incorporates ADAS features to enhance driving safety. These include Lane Departure Warning (LDW), which alerts you if you drift from your lane, and Forward Collision Warning (FCW), providing warnings of potential front-end collisions.
ADAS relies on accurate calibration and clear visibility. Ensure the camera lens is clean and the system is properly configured within the settings menu for optimal performance. False alarms may occur in adverse conditions.
Troubleshooting Common Issues
Camera Not Recording: Verify the SD card is properly inserted and formatted. Check power connections and ensure sufficient battery or vehicle power. Confirm loop recording isn’t disabled.
Video Quality Problems: Clean the camera lens. Adjust resolution settings within the menu. Ensure adequate lighting conditions. Check the SD card’s write speed; a slow card can cause issues. Consider a firmware update for potential improvements.
Camera Not Recording
Troubleshooting Steps: First, confirm the SD card is securely inserted and correctly formatted to be compatible with the Vantrue N4. Next, meticulously check all power cable connections, ensuring a stable power source. Verify loop recording isn’t accidentally disabled in the settings menu. Finally, a full battery charge or consistent vehicle power is crucial for continuous operation.
Video Quality Problems
Addressing Poor Footage: Ensure the lens is clean and free from obstructions like dirt or smudges. Confirm the resolution and video quality settings within the Vantrue N4 are set to your desired preference. Check the SD card’s write speed; a slower card can impact recording quality. Finally, adequate lighting conditions are essential for clear video – poor visibility affects results.
Downloading and Viewing Footage
Accessing Your Recordings: Footage can be directly accessed by removing the SD card and inserting it into a computer. Alternatively, utilize the Vantrue app for convenient mobile access to downloaded videos. The app allows for easy viewing, downloading, and sharing of recorded events. Ensure compatibility with your device for seamless file transfer and playback. Regularly check for app updates for optimal performance.
Accessing Files via SD Card
Direct File Access: To view footage, safely remove the SD card from your Vantrue N4 and insert it into a compatible card reader connected to your computer. Navigate to the SD card’s directory to locate recorded video files. These are typically stored in a dedicated folder. Ensure your computer has the necessary codecs for smooth playback. Back up important footage to prevent data loss.
Using the Vantrue App for Mobile Access
Mobile Connectivity: Download the Vantrue app to your smartphone (iOS or Android) for convenient access to your dash cam footage. Connect the N4 to your phone’s Wi-Fi network, as detailed in the app’s instructions. Once connected, you can view, download, and manage recordings directly from your mobile device. The app also enables real-time viewing and remote control of certain camera settings.
Firmware Updates and Maintenance
Maintaining Performance: Regularly check the Vantrue official website for firmware updates to ensure optimal performance and access to new features. Updates address bugs, improve stability, and enhance compatibility. Download the latest firmware to your SD card and follow the on-screen instructions within the camera’s settings menu to perform the update. A stable power supply is crucial during this process.
Checking for Updates

Update Availability: To check for firmware updates, visit the Vantrue official website. Navigate to the support section and locate the N4 model page. Download the newest firmware version if available. Alternatively, some dashcams may have an automatic update check function within the settings menu, though this isn’t explicitly stated for the N4. Regularly checking ensures your device benefits from the latest improvements.
Performing a Firmware Update
Update Process: Download the firmware file from the Vantrue website and format a microSD card. Copy the firmware file to the root directory of the card. Insert the card into your N4 dashcam while it’s powered off. Power on the device; it should automatically detect and begin the update process. Do not interrupt power during the update, as this could damage the device.
Legal Considerations and Usage
Regulations Vary: Be aware that local laws regarding dash cam usage differ significantly. Some jurisdictions restrict or prohibit recording audio, or require visible notification that recording is in progress. Always research and adhere to the specific regulations in your area. Using a dash cam doesn’t grant permission to violate privacy laws; respect the privacy of others while operating your Vantrue N4.
Local Laws Regarding Dash Cam Usage
Understand Restrictions: Before using your Vantrue N4, investigate local laws concerning dash cam operation. Some areas prohibit recording within certain zones, like private property, or require conspicuous signage indicating video surveillance. Audio recording is often subject to stricter regulations, potentially requiring consent from those recorded. Failure to comply could result in legal penalties; prioritize responsible and lawful operation.
Resources and Support
Vantrue provides extensive support for the N4. Visit the official Vantrue website for detailed product information, downloadable resources, and the latest firmware updates. Explore the Vantrue N4 product page for specific details. A comprehensive FAQ section addresses common issues. For direct assistance, contact Vantrue’s customer support team through their website for prompt and helpful solutions to any questions.
Vantrue Official Website
The Vantrue official website serves as a central hub for all N4-related information. Here, you’ll find detailed product specifications, user manuals, and frequently updated firmware downloads; Explore the support section for troubleshooting guides and access to Vantrue’s customer service team. The website also showcases compatible accessories and provides a platform for registering your Vantrue N4 dashcam, ensuring access to exclusive benefits and support.
Frequently Asked Questions (FAQ)
Common questions regarding the Vantrue N4 often center around installation, loop recording, and troubleshooting video quality issues. Users frequently inquire about compatibility with specific vehicle models and SD card specifications. The Vantrue website provides a comprehensive FAQ section addressing these concerns. Additionally, users seek clarification on ADAS features and parking monitoring functionality. Consulting the FAQ can quickly resolve many common setup and operational questions.