
Craftsman 919 Air Compressor Parts Manual: An Overview
Craftsman 919’s manual is vital for maintenance, repairs, and understanding its components; diagrams, safety tips, and troubleshooting ensure optimal performance and longevity.
The Craftsman 919 compressor stands as a reliable workhorse for various air-powered tools, commonly found in home workshops and job sites. Understanding its construction and operation is key to maximizing its lifespan and performance. This compressor, available in several variations like 919.152041 and 919.152042, features a robust design intended for intermittent use.
Its portability and relatively compact size make it a versatile choice for tasks ranging from inflating tires to powering nail guns. However, like any mechanical device, the Craftsman 919 requires regular maintenance and occasional repairs. Accessing a comprehensive parts manual is therefore essential for owners seeking to diagnose issues, order replacements, and perform necessary upkeep, ensuring continued reliable operation.
Importance of a Parts Manual
A Craftsman 919 air compressor parts manual is absolutely crucial for effective maintenance and repair. It provides detailed exploded views, clearly labeling each component – from the motor and pump assembly to valve assemblies and the pressure switch. This visual guide simplifies identifying worn or broken parts, preventing incorrect ordering and wasted time.
Beyond part identification, the manual offers vital safety guidelines and troubleshooting steps. It empowers users to perform repairs confidently, potentially saving on costly service calls. Accurate parts ordering, facilitated by the manual’s key numbers, ensures compatibility and proper functionality, ultimately extending the compressor’s lifespan and maintaining optimal performance.

Identifying Your Craftsman 919 Model
Correct model identification—like 919.152041 or 919.152042—is essential for sourcing the right Craftsman 919 parts and accessing the correct manual.
Decoding the Model Number (919.152041, 919.152042 etc.)
Understanding your Craftsman 919 compressor’s model number is paramount for accurate parts identification and ordering. Numbers like 919.152041, 919.152042, 919.152120, and others denote specific configurations. These variations impact component compatibility. The initial “919” signifies the core compressor series, while the subsequent digits pinpoint unique features or manufacturing dates.
For instance, different numbers may indicate variations in tank size, horsepower, or valve assemblies (01B047, 01B048, 01B049). Always reference the complete model number when searching for replacement parts or consulting the parts manual to ensure a precise match. Incorrect parts can lead to malfunctions or safety hazards, so precision is key.
Locating the Model Number on the Compressor
Finding the model number on your Craftsman 919 air compressor is the first step towards successful parts identification. Typically, a metal data plate is affixed to the compressor’s tank or motor housing. This plate contains crucial information, including the model number (e.g., 919.152041, 919.152042).
Carefully inspect all sides of the compressor, paying close attention to areas near the power switch, air fittings, and base. The model number is often stamped or printed in a clear, legible font. Having this number readily available streamlines the process of ordering replacement parts and accessing the correct documentation for your specific Craftsman 919 model.

Essential Components & Parts Diagrams
The Craftsman 919 diagram details the motor, pump, valve assemblies, pressure switch, and air filter, aiding accurate part location and replacement.
Air Compressor Pump Assembly
The pump assembly is the heart of the Craftsman 919 air compressor, responsible for drawing in air and compressing it for storage within the tank. Understanding its components is crucial for effective maintenance and repair. Key parts include the piston, cylinder, connecting rod, and valves – intake and exhaust.
Diagrams within the parts manual clearly illustrate the arrangement of these components, aiding in disassembly and reassembly. Regular inspection of the pump assembly for wear and tear, such as worn piston rings or damaged valves, is essential to maintain optimal compressor performance. Replacement parts are readily available through Sears PartsDirect and other suppliers, utilizing the detailed parts diagrams for accurate ordering. Proper pump function directly impacts the compressor’s ability to deliver consistent air pressure.
Motor Specifications and Replacement
The Craftsman 919 air compressor’s motor provides the power to drive the pump assembly. The parts manual details crucial motor specifications, including horsepower (HP), voltage, and amperage, vital for selecting a compatible replacement. Typically, these compressors utilize a single-phase induction motor.
When replacing the motor, ensure the new unit matches these specifications precisely to avoid performance issues or safety hazards. The manual provides step-by-step instructions for motor removal and installation, emphasizing safety precautions like disconnecting power before commencing work. Diagrams illustrate wiring connections and mounting points. Sourcing a replacement from Sears PartsDirect or a reputable supplier guarantees compatibility and quality.
Valve Assemblies (01B047, 01B048, 01B049)
Craftsman 919 compressors utilize various valve assemblies, commonly identified by part numbers like 01B047, 01B048, and 01B049, each serving a specific function within the air system. The parts manual provides detailed exploded views of these assemblies, showcasing individual components like check valves, unloader valves, and safety valves.
These diagrams are crucial for identifying worn or damaged parts. Replacing faulty valve assemblies is essential for maintaining proper air pressure and compressor functionality. The manual outlines the correct installation procedure, ensuring proper sealing and operation. Accurate identification using the part number is vital when ordering replacements, guaranteeing compatibility with your specific 919 model.
Pressure Switch Details & Troubleshooting
The Craftsman 919’s pressure switch regulates air compressor operation, controlling when the motor starts and stops based on tank pressure. The parts manual details its construction and function, aiding in troubleshooting common issues. If the compressor fails to start or runs continuously, the pressure switch is a prime suspect.
Manual diagrams illustrate the switch’s internal components and wiring. Troubleshooting steps include checking electrical connections, adjusting the cut-in/cut-out pressure settings, and testing for continuity. Replacement is straightforward, but safety precautions—disconnecting power—are paramount. A faulty pressure switch can lead to over-pressurization or motor burnout, so prompt attention is crucial.
Air Filter and Intake System
The Craftsman 919 air compressor’s intake system, featuring a crucial air filter, protects the pump from debris and ensures clean air delivery. The parts manual provides detailed diagrams of the filter housing and associated components, facilitating maintenance and replacement. A clogged filter restricts airflow, reducing compressor efficiency and potentially causing overheating.
Regular inspection and cleaning, or replacement as needed, are vital. The manual outlines the correct filter type and replacement procedure. Maintaining a clean intake system extends pump life and ensures optimal performance. Ignoring this component can lead to premature wear and costly repairs, impacting the compressor’s overall longevity.

Troubleshooting Common Issues
The manual aids in diagnosing problems like failure to start, low pressure, or air leaks, offering solutions for efficient repairs and optimal performance.
Compressor Won’t Start: Diagnosis
When your Craftsman 919 compressor fails to start, the parts manual becomes invaluable. Begin by checking the power source – ensure it’s properly connected and functioning. Next, inspect the pressure switch; a faulty switch is a common culprit. The manual’s diagrams pinpoint its location for easy access and testing.

Also, examine the motor’s overload protector, which may have tripped. Refer to the manual’s motor specifications for reset instructions. A worn-out start capacitor can also prevent starting; the manual details its replacement procedure. Finally, verify the pump isn’t seized – attempt manual rotation (with power off!). The manual provides detailed troubleshooting steps and exploded views to aid in accurate diagnosis and repair, minimizing downtime and maximizing compressor life.
Low Air Pressure: Identifying the Cause
Experiencing low air pressure with your Craftsman 919? The parts manual is your first resource. Begin by inspecting the air filter – a clogged filter restricts airflow, reducing performance. The manual’s diagrams show its location and replacement steps. Next, check for air leaks around fittings, hoses, and the tank; use soapy water to detect bubbles.
A failing pressure switch, detailed in the manual, might not be building sufficient pressure. Examine the valve assemblies (01B047, 01B048, 01B049) for wear or damage, referencing the exploded views. Finally, a worn pump can’t deliver adequate pressure. The manual’s parts list helps identify replacement components, ensuring efficient repair and restoring optimal compressor functionality.
Air Leaks: Detection and Repair
Air leaks significantly reduce your Craftsman 919’s efficiency. The parts manual guides leak detection; start by listening for hissing sounds. A simple soapy water solution applied to fittings, hoses, and the tank reveals leaks through bubbling. The manual’s diagrams pinpoint component locations for easy inspection.
Tighten loose fittings first. If leaks persist, inspect hoses for cracks or damage – the parts list aids replacement. Check valve assemblies (01B047, 01B048, 01B049) for worn seals, referencing exploded views. A damaged tank requires professional repair. Accurate parts ordering, using the manual’s key numbers, ensures a proper fix, restoring optimal air pressure and performance.
Overheating Problems and Solutions
Craftsman 919 compressor overheating signals potential issues needing prompt attention. The parts manual assists in diagnosing the cause. Insufficient ventilation is a common factor; ensure clear airflow around the unit. Check the oil level – low oil increases friction and heat; the manual details oil change procedures.
A malfunctioning pressure switch can cause continuous running, leading to overheating. Inspect the motor specifications; a failing motor draws excessive current. The diagram helps locate the motor for inspection or replacement. Ensure the cooling fan operates correctly. Referencing the parts list ensures correct component replacement, preventing further damage and restoring safe operation.

Parts Replacement Guide
Replacing parts requires safety precautions and the correct tools; the manual provides detailed steps for components like the pressure switch and air filter.
Safety Precautions Before Repair
Prior to any repair work on your Craftsman 919 air compressor, disconnecting the power source is absolutely critical. This prevents accidental startup during disassembly or component handling. Ensure the air tank is completely depressurized by opening the drain valve and verifying zero pressure with a gauge.
Wear appropriate personal protective equipment (PPE), including safety glasses to shield your eyes from debris and gloves to protect your hands. Be mindful of sharp edges on the compressor’s housing and internal parts. Avoid working in damp or wet conditions to minimize electrical shock hazards.
If dealing with the pump or motor, be aware of potential hot surfaces. Allow sufficient cooling time before touching these components. Always consult the parts manual for specific safety warnings related to the part you are replacing.
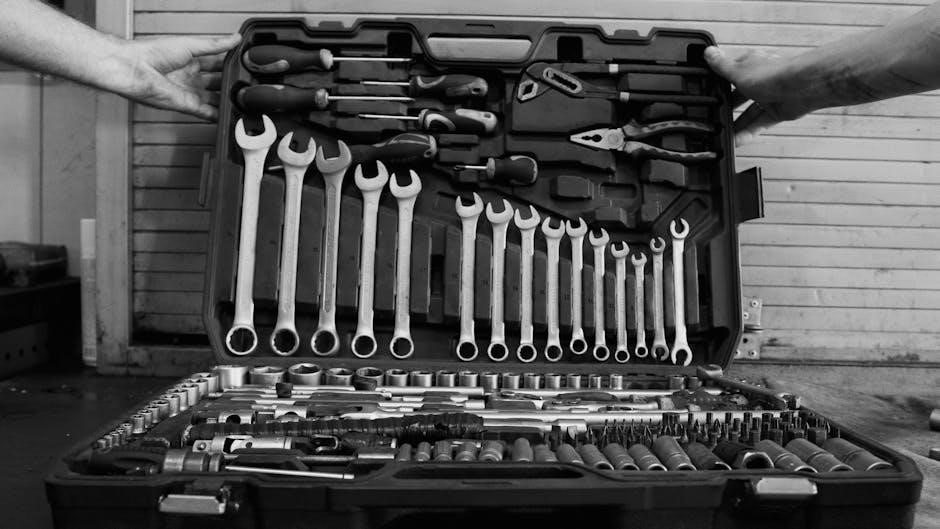
Tools Required for Common Repairs
Successfully repairing your Craftsman 919 air compressor necessitates a basic toolkit. Essential items include a socket set with various sizes, adjustable wrenches, screwdrivers (Phillips and flathead), and pliers. A pressure gauge is crucial for verifying tank pressure after repairs. For pump or motor work, a multimeter is helpful for electrical testing.
Thread sealant is needed when reassembling fittings to prevent air leaks. A penetrating oil assists in loosening corroded bolts. Depending on the repair, you might also require a valve core remover, an air compressor oil, and potentially specialized tools for specific valve assemblies.
Always prioritize using the correct tool for each task to avoid damaging components.
Replacing the Pressure Switch
Before replacing the pressure switch on your Craftsman 919, disconnect the air compressor from the power source! Carefully remove the old switch, noting the wiring configuration – take a picture for reference. Ensure the new switch matches the original’s specifications (voltage, pressure range).
Connect the wires to the new switch identically to the old one. Tighten the fittings securely, using thread sealant if necessary, to prevent air leaks. Reconnect the power and test the compressor, verifying it cycles on and off at the correct pressure settings.
Double-check for leaks around the switch.
Replacing the Air Filter
Maintaining a clean air filter is crucial for your Craftsman 919’s performance. Begin by disconnecting the compressor from the power source. Locate the air filter housing – typically near the compressor’s intake. Open the housing and remove the old filter, noting its orientation.
Clean the housing interior to remove any debris. Install the new air filter, ensuring it’s properly seated and oriented as the old one was. Securely close the filter housing.
A clean filter improves airflow and extends the compressor’s lifespan. Regularly inspect and replace the filter as needed.

Finding and Ordering Parts
Parts can be sourced from Sears PartsDirect or third-party suppliers; utilize parts diagrams for accurate identification and ordering to ensure compatibility.
Sears PartsDirect Website
Sears PartsDirect is a primary resource for Craftsman 919 air compressor parts, offering a comprehensive online catalog specifically tailored to Sears products. Navigating the website is streamlined by utilizing your compressor’s complete model number – such as 919.152041 or 919;152042 – to pinpoint the correct components.
The site features detailed parts diagrams, mirroring those found in the official manual, allowing for visual confirmation of the required part. You can easily search by part number (like 01B047, 01B048, or 01B049) or by component description. Sears PartsDirect often provides compatibility information, ensuring the part fits your specific 919 model. Furthermore, the website displays real-time inventory status and estimated shipping times, facilitating informed purchasing decisions.
Third-Party Parts Suppliers
Beyond Sears PartsDirect, several third-party suppliers offer Craftsman 919 air compressor parts, providing alternative sourcing options and potentially competitive pricing. Websites like Amazon, eBay, and dedicated small engine parts retailers frequently stock components for older Craftsman models.
When utilizing these suppliers, meticulous verification of part compatibility is crucial. Always cross-reference the part number with your compressor’s model number (e.g., 919.152141, 919.152142) and consult the parts diagram in your manual. Be mindful of return policies and seller ratings to ensure a smooth transaction. While offering broader selection, these platforms require diligent research to guarantee accurate part acquisition.
Using Parts Diagrams for Accurate Ordering
The Craftsman 919 air compressor parts manual’s diagrams are essential for precise part ordering. These exploded views clearly illustrate each component’s location and relationship to others, minimizing errors. Each part is assigned a key number, corresponding to a detailed parts list.
When ordering, always verify the key number matches the required part. Note any revisions or supersessions indicated in the manual. Diagrams help confirm the correct part shape, size, and thread type. Utilizing these visuals alongside part numbers significantly reduces the risk of receiving incorrect replacements, saving time and preventing further complications during repairs.
Understanding the Manual’s Diagrams
The manual utilizes exploded views and key numbers for easy part identification; safety symbols and warnings are also included for safe repair practices.
Interpreting Exploded Views
Craftsman 919’s parts manual employs exploded views, which are detailed illustrations showcasing how each component assembles within the air compressor. These diagrams aren’t literal representations of the compressor’s internal structure, but rather a deconstructed visual aid. Parts are depicted as if “exploded” away from their assembled positions, allowing for clear visibility of each component and its relationship to others.
Understanding these views requires recognizing that parts appearing closer to the center generally assemble first, while those further out are added later in the process. The manual’s diagrams are designed to help users visualize the assembly sequence and identify the precise location of each part. This is crucial for accurate disassembly and reassembly during repairs or maintenance.
Parts List and Key Numbers
The Craftsman 919 air compressor parts manual features a comprehensive parts list accompanying each exploded view diagram. Each component within the diagram is assigned a unique key number, serving as a direct reference point to the corresponding entry in the parts list. This list details the part’s name, part number (e.g., 01B047, 01B048), and often includes quantity information.
Accurate part identification relies on cross-referencing the key number from the diagram with the parts list. This ensures you order the correct replacement component. The parts list is essential for ordering, as suppliers typically require the part number for accurate fulfillment. Utilizing both the diagram and list together streamlines the repair process.
Safety Symbols and Warnings
The Craftsman 919 air compressor parts manual prominently displays safety symbols and warnings throughout. These crucial indicators alert users to potential hazards during maintenance and repair. Common symbols include warnings about electrical shock, moving parts, and the risk of pressurized air.
Understanding these symbols is paramount for preventing injury. The manual emphasizes disconnecting the power supply before any work begins, wearing appropriate safety gear (eye protection, gloves), and relieving air pressure from the tank. Ignoring these warnings can lead to serious harm; Always prioritize safety and consult the manual before attempting any repairs.

Maintenance and Longevity
Regular maintenance, including oil changes and proper storage, significantly extends the Craftsman 919’s lifespan and ensures consistent, reliable performance over time.
Regular Maintenance Schedule
Establishing a consistent maintenance schedule is paramount for maximizing the lifespan and efficiency of your Craftsman 919 air compressor. Begin with a daily check for loose parts, air leaks, and unusual noises before each use. After every 50-100 hours of operation, drain the tank completely to prevent corrosion and sediment buildup.
Inspect and clean the air filter frequently, replacing it when visibly dirty – typically every 25-50 hours. Monitor the oil level and change the oil every 300-600 hours, or annually, whichever comes first. Regularly check the pressure switch for proper operation and calibrate if necessary. Finally, inspect hoses and fittings for wear and tear, replacing them proactively to avoid unexpected failures and maintain optimal performance.
Oil Change Procedures
Performing regular oil changes is crucial for the longevity of your Craftsman 919 compressor. First, ensure the compressor is turned off and unplugged. Drain the old oil by locating and removing the drain plug, allowing it to fully empty into a suitable container.
Next, replace the oil filter if your model has one. Carefully add the recommended oil type – typically SAE 30W – to the fill level indicated on the dipstick, avoiding overfilling. Reinstall the drain plug securely. Run the compressor briefly and recheck the oil level, adding more if needed. Properly dispose of the used oil and filter according to local regulations.
Storage Recommendations
Proper storage extends the life of your Craftsman 919 air compressor. Before long-term storage, drain all air from the tank and the air lines to prevent corrosion. Add a small amount of oil to the cylinder through the air intake to lubricate internal components during inactivity.
Cover the compressor to protect it from dust and debris. Store it in a dry, well-ventilated area, avoiding extreme temperatures and humidity. Periodically check the compressor and its connections for any signs of damage or corrosion. Following these steps ensures your compressor is ready for use when needed.